

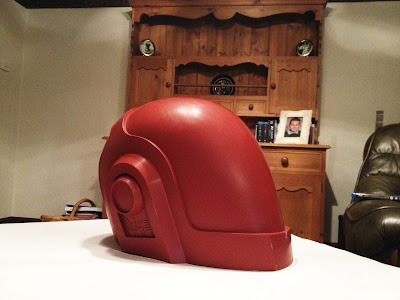
After building both of Daft Punk's helmets last year I learnt an awful lot, they were my first large scale project and with them came a whole array of new techniques and materials I hadn't used before. After looking back on them now after learning all these processes I felt I could do a much better job on these helmets and with the new album came the new helmet design for Guy Manuel giving me an opportunity to begin again.

Research and pre planning was something that needed to be built upon vastly compared to the last time I attempted this so I scoured the internet for reference photos and built up a small library. I was able to use the different shots I found to create technical drawings in Illustrator. I overlayed my work onto multiple photos of Guy's helmet until it matched well in all the profile and front on shots I had and I was confident it was accurate.

To test scaling I first printed the design onto card, luckily I had scaled it to the correct height on first go... I think. So I was ready to transfer the plans to MDF.
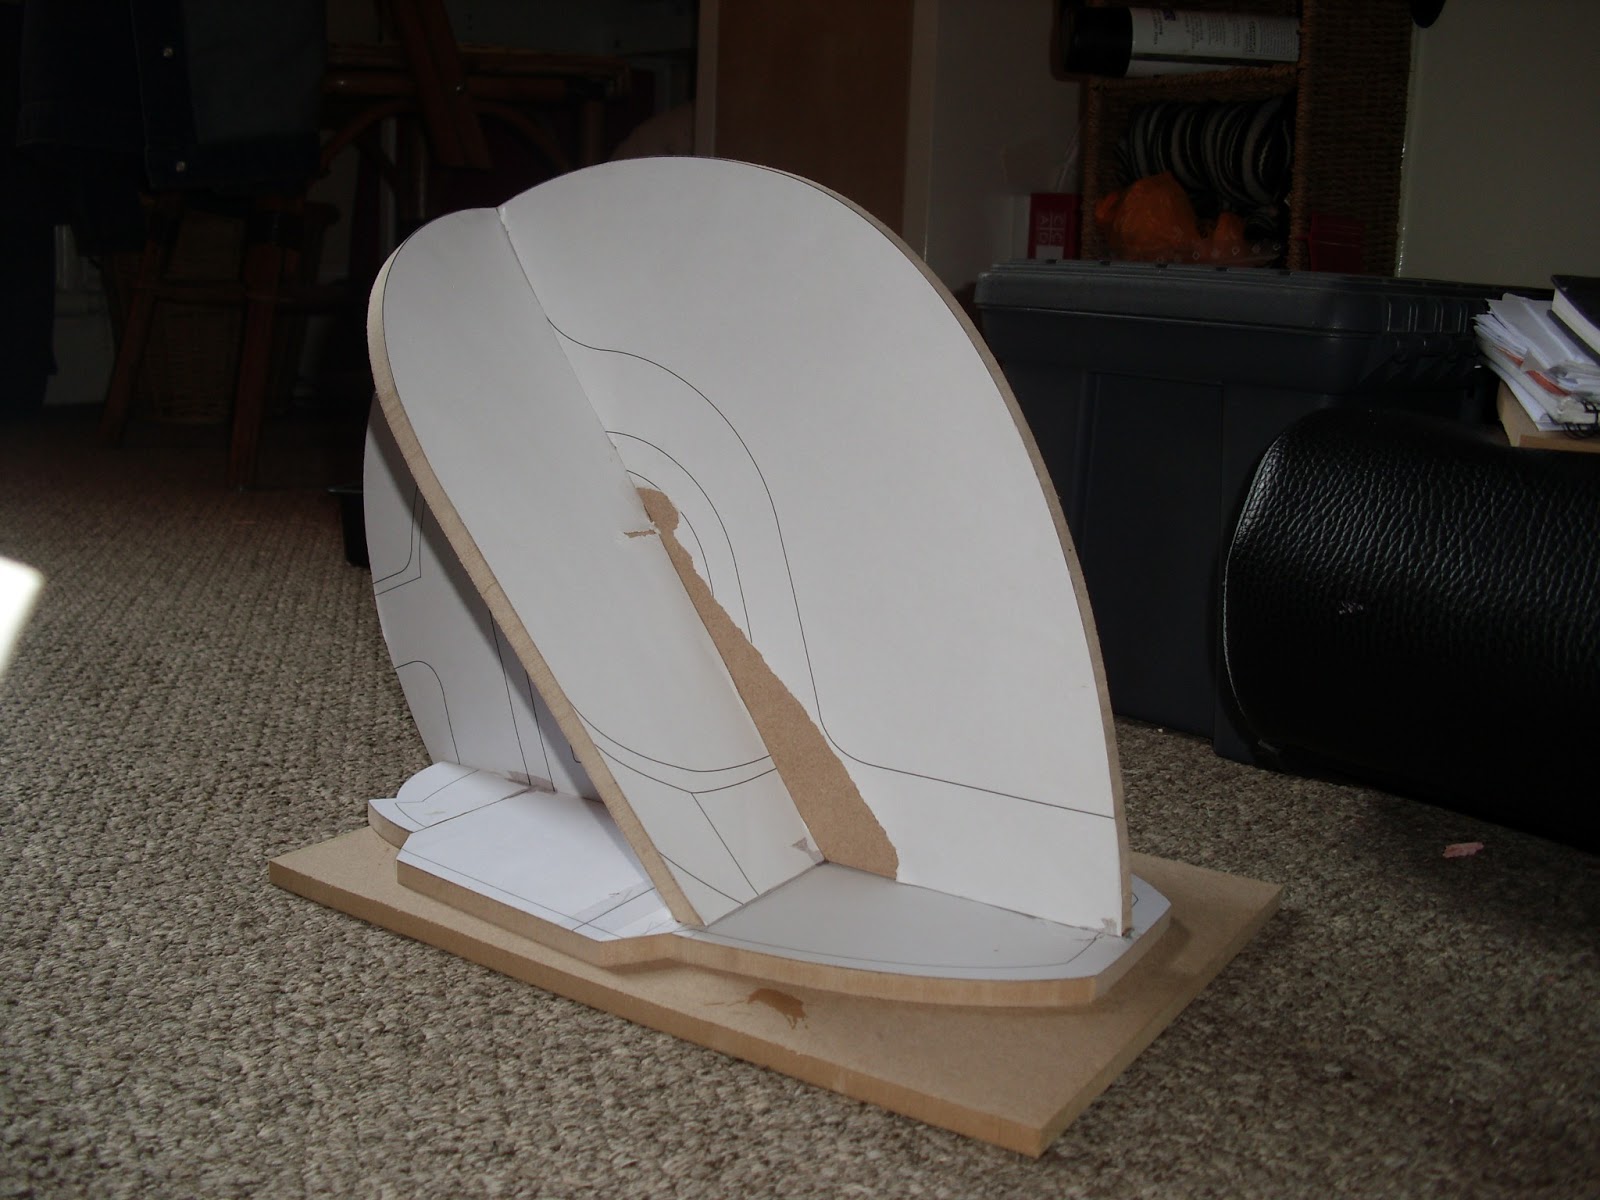
The pieces were all slotted together and held together from the tight joins so glue wasn't really necessary, but I tacked a few of the joins with superglue to make sure nothing shifted whilst I worked on it.

Blocks of carving foam were glued onto the MDF and shaped with a rasp and sandpaper to get the rough overall shape. Once that was done the foam was sealed using resin before I added the first skim of Body Filler.


.JPG)


Print coat

After another layer of normal silicone the first thickened layer was applied.


The Mother mould frames were made from MDF and the Mother mould was made using a layer of fibreglass tissue to catch the detail and then a few layers of fibreglass Matt to build up wall strength.

The skirting worked well and created a neat overspill for the resin making trimming the casts straight forward.


Nervously watching as the final layer cures....


Blocks of carving foam were glued onto the MDF and shaped with a rasp and sandpaper to get the rough overall shape. Once that was done the foam was sealed using resin before I added the first skim of Body Filler.


A mounting point for the ear detail was made using more filler and an MDF form, I used this as a reference point for the curvature of the rest of the helmet, here you can see the back almost finished and how the front needs building out to match the ear base.

The main form is now finished and the placement for the raised detail has been sketched onto the surface with the aid of paper templates created from my vector blueprint, they can be seen a little clearer if you enlarge the photo. Some of the jaw area was left unfinished at the bottom as this will be covered by the raised detail .

After sampling a few ideas I did a few material tests to find a way to attach my guides strongly but temporarily so that they could be removed without leaving marks all over the nice pretty dome. A painters tape I had was easy to peel off without leaving a mark so I used that as a base to attach the plastic guides.

The guides were made to the correct curvature by using a tile shaping tool I re purposed as a curve guide, I simply placed it on top of the pencil guides and then drew round the curve it created onto the plastic sheet.

Once the guides were in place all I had to do was fill them with filler, I decided to do this in two sections so I will work on the front half first, then make guides for the back half so that I can focus on one area at a time.

The front of the helmet has taken shape now and the back form has been roughed in.


The back half has now been filled and smoothed, my templates were used to make sure each side was symmetrical and the next stage will be to engrave the lines around the back dome.


The engraved detail in the back section of the helmet was first drawn out in pencil and then templates were made using a few scraps of plastic, the plastic templates were temporarily taped to the surface to stop them from shifting whilst I used a scribing tool to mark the lines in the surface, these shallow lines were then deepened using a miniature file. Using plastic templates helped give me get a level and symmetrical line straight away.


The back section was bevelled with a small tool made from styrene and the last of the engraved detail was then added to the sides.

After checking my reference photos I realised that I had made the bottom edges of the raised detail too thick and thinned them down to the same width as the rest of the raised detail.


The next piece I made was the neck guard, the shape was cut out of styrene and a spacer was added to the edge to give the right depth. I then taped the edges down to create a hinge, the plastic piece was covered in filler and then squashed down and the excess filler was scraped away.
.JPG)
Sanded smooth.

I created a 3D file and technical drawing of the ear pucks as I don't own my own lathe so I will need to outsource for this part of the build.

The ear surrounds were the next piece to be made, I laminated pieces of MDF together to the required thickness and cut the shape out on a bandsaw. The recessed area was drawn out and holes were drilled for the jigsaw to cut through.

Before cutting out the front I used a router to recess the back of the surround to create the insert for the circuitboard detail.


A holesaw was used to cut out the curved top, luckily the local hardware shop had one the exact size I needed ! after that the centre was cut out using a jigsaw.

Outer edge was then angled using a chamfer bit and router.


I laser cut my circuit board patterns out of 2 mm acrylic and glued them inside the ear surrounds, I then backfilled the inside with filler to strengthen the pieces ready for vac-forming. Now I can start spot filling whilst I wait for the plastic for the vac former to arrive.


The ear surrounds are now attached to the helmet and the details have been finished, now I can prepare my moulding supplies whilst I wait for my ear pucks to be delivered.


The ear pucks came in and I got a few coats of primer on them and wetsanded them smooth.


The helmet has been given its coats of primer with a light sand in between coats ready to be wet sanded once the last coat is fully hardened.


The ear pieces have been attached and the whole helmet has been wetsanded from 600 grit up to 1500 grit to get it nice and smooth ready for moulding.

Using a block of foam I laminated two pieces together to create a platform for the helmet to sit on and allow enough space to get to the detail underneath. A skirt was added to the bottom of the helmet from styrene sheet to make the resin casts easier to finish.


Print coat

After another layer of normal silicone the first thickened layer was applied.

After another few layers the registration keys were applied all over to make sure the silicone mould would lock into the fibreglass mother mould.


The Mother mould frames were made from MDF and the Mother mould was made using a layer of fibreglass tissue to catch the detail and then a few layers of fibreglass Matt to build up wall strength.

The skirting worked well and created a neat overspill for the resin making trimming the casts straight forward.

The mould came out great ! The engraved lines and circuit-board detail came out nice and sharp. The mould is now ready for its first casting.

Nervously watching as the final layer cures....


Aaaaand the first cast ! other than a few dinks in the visor area (which will be removed anyway) the cast came out really well and after learning from the first use of the mould I think the next cast will come out better.


And here's a spiffy looking chap modelling my helmet cast to check fit and scale, looking pretty good I think !