Thursday, 30 May 2013

Daft Punk - Random Access Memories Necklaces


With the new album came a fresh set of costumes, even the helmets have been tweaked, but the necklaces are the most interesting new addition I think so I set about making the pair.


The basic pyramid was built using styrene and the edges and corners were given a coat of filler and sanded to a fine point.


Since both Thomas and Guy have different designs on their pyramids I decided to mould the basic form first so that I had two copies that I could then build the individual details onto and remould. The piece was wet sanded with 1200 grit sand paper and placed in the bottom of an old plastic container ready to mould. I tacked the piece down with a small dab of superglue under each point, this will stop it from moving whilst the silicone sets but should easily snap back off the bottom of the container when I'm done.


As usual Rebound 25 was used for this mould, the depth and size of the container gave me about an inch of space both around and on top of the piece so the finished silicone mould would be nice and strong.


Once the mould was out of the way I created the detail pieces I needed from more styrene, I made Guy Manuels necklace first and I will add the Thomas detailing to the resin cast pyramid from my mould. 


I cast up the base pyramid in urethane resin and then built up Thomas' Necklace the same way as Guy's.


Both were wet sanded starting from 800 grit to 1500 to get a nice smooth finish.


Ready for moulding.


Finished casts primed and wet-sanded.

Monday, 14 January 2013

Sci-Fi Robot Helmet


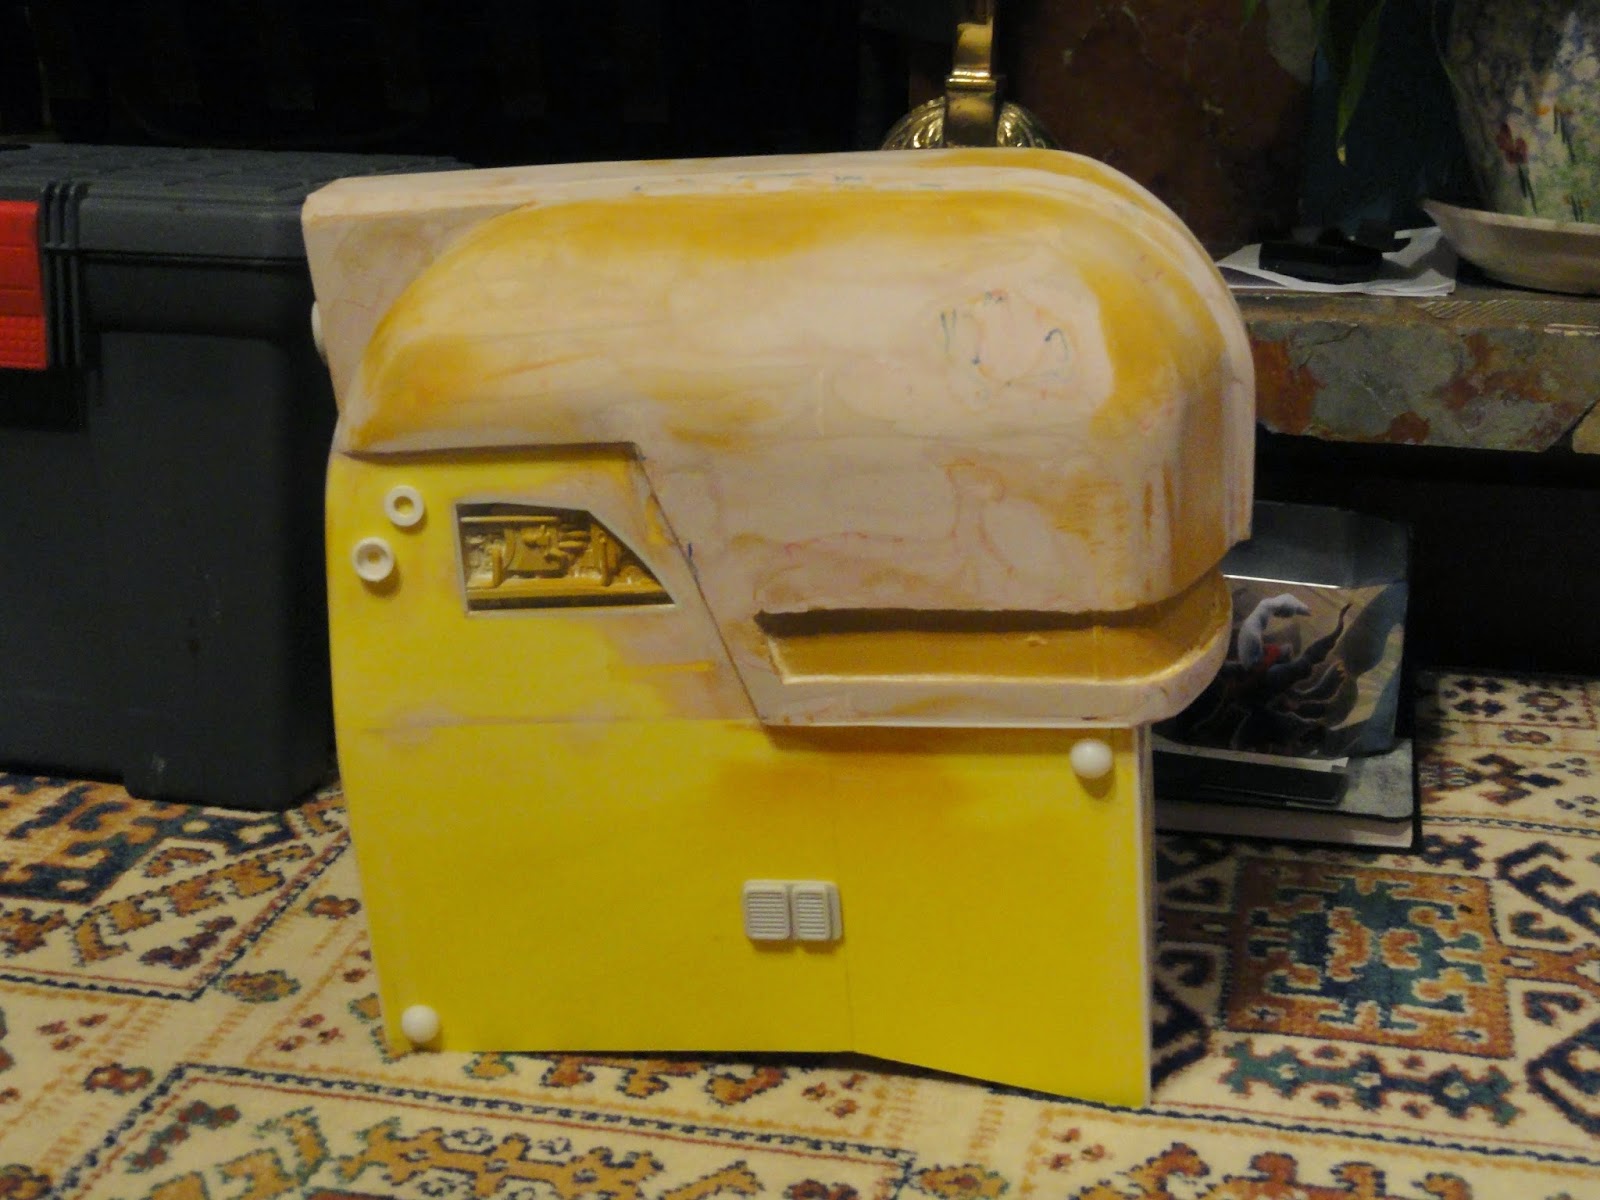
This was a fairly quick and simple project for Uni, we were each tasked to create a mask with some sort of genre to inspire it. Me being me I decided to go with a Sci-Fi theme for this project, the idea behind it being that this design was meant for an old obsolete service droid. 


I mocked up the basic design for this piece as a 3D model and then converted it to a pepakura file, this then allowed me to print my design on card as a flat pattern that could be folded and glued into a hollow card copy of the 3D model. 


The lower half of the card model was only built to check the size and fit of the helmet, the card pieces were used a s templates and then drawn onto 2 mm acrylic sheet. The curved card top half of the design was slush cast inside with body filler to give me a hollow sandable copy of the shape, this was attached to the acrylic bottom piece and sanded smooth.

the helmet was detailed by adding pieces of model kits, plastic washers, bolts and other plastic objects I found that could pass as robotic pieces.


To paint the helmet I spray painted the piece in satin grey and black as a base coat, to weather the piece I sued a combination of dry brushing and acrylic washes to make the piece look old and broken. Once painted the visor section was covered using aluminium mesh, the mesh was fine enough to see out of but also stop people from the outside seeing the wearers face.

To finish the piece I also made a decal which I ripped and weathered to match the rest of the helmet.


Saturday, 20 October 2012

Magneto Project

Here's one I haven't seen anyone do yet which surprised me, Magneto's helmet from the first Xmen movie:


I managed to find an old pepakura file floating around that I think was modelled by Dungbeetle, the file was not created by me. I think the file was an early draft, the faceplate if you will and the helmet section are separate pieces and when overlayed with an image of the screen used helmet the shapes were a little off:


I sketched over the actual model with the basic forms of the screen helmet as a reference whilst I was building the pepakura model, with the paper helmet I redid most of the major shapes such as the eye shape, ear slots and the crown shape that curves above the ear down to the front of the helmet. Some of the other mods I will leave till I get to the bondo stage. 


The crown piece needed a lot of reshaping, so I added more card to the area to create more accurate curves, the same went for the ear slots. Luckily with only a few little patches the old lip pieces fit around the new shapes and it didn't take too long to get the whole thing built.

The helmet looks pretty dam messy at this stage but that's because I glue all the tabs onto the outside to give a smooth interior since I will be using the same process here as I used on the Guy Manuel Helmet, with the new crown shape I needed to recut the inside of the helmet to reveal the new shape so that the bondo mix would reach right into the small corners.


The right side has been roughly trimmed out here and you can see how the left side was covering the now lower profile of the front detail. Small triangles were cut out of the crown pieces edges so that it could curve into the same shape as the rest of the helmet as the original shape was too blocky.


I then made some inner supports that matched up to the new shape to keep it symmetrical and prevent warping during the next stage.


Now all ready to go !


Wednesday, 12 September 2012

No Budget Prop Building !

I decided to set a challenge and try to make something using only the random junk in the garage and this is the build that followed :

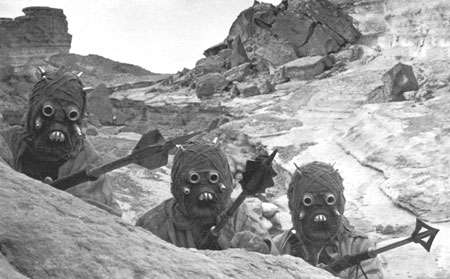
I decided to carry on the Star Wars theme I've been on for the past few weeks and made a Gaffi stick, the weapon used by the Tusken raiders.


I decided to base mine on the one in the middle since most people seem to go for the one on the left, thought I'd mix it up a little haha.


I made a paper mock up of the size I guesstimated the war club should be and cut an old curtain rail to size, I then stripped off the paint and gave it a dark stain.


I used a spade bit (I think thats what they're called?) to bore a hole into one end of the shaft for the metal club piece to attach.

For the metal piece I used a metal rod from an old flatpack greenhouse after removing the paint the bare metal had a worn look to it which made it fit perfect for the used feel I wanted. I cut slots into the metal with my dremel for the mace tip to slot into.


Next a paper template was made for the mace piece which was traced onto an old empty plastic tub, I made two identical pieces that were slotted together into a cross shape which then fit into the metal rod.


The next step was detailing, I cannibalised an old bike pump for some little pieces, ended up taking a washer and two connectors, filled the writing on the connector piece and glued the main pieces. each piece was painted a dark metallic colour to try blend with the real metal.


Using hot glue I went along where each piece met with another to create a messy welded look, the hot glue was painted to match the plastic pieces. The photos don't pick up how metallic the paint actually looks.


Jango Fett Helmet Quick Project

Ok so since I already molded the Boba Fett helmet I made I cast myself a copy and decided to convert it into a Jango Fett Helmet, using a blob of body filler I smoothed over the 'dent' on the front of the helmet, sanded off the greeblie on the cheek and modified the range finder assembly using my dremel and a little body filler again to neaten everything up.

Once that was done I gave the whole thing about 7 coats of filler primer and then buffed it with some 1500 grit sandpaper.

Next step was to coat the whole thing in chrome spray paint, the best finish I could find that was affordable and I think came out looking pretty decent :


Once the paint had been left to harden for a few days I masked off the cheeks and got to work painting the two shades of blue, the darker blue I used has a slight turquoise tinge to it which seemed close enough to the references I was working from.


Jango Pre Op 

Next I cut out a section of mesh and painted it the same colour as the cheeks


Once the paint was dry the mesh and visor were installed and secured with hot glue along with some padding to prevent any bobble head action when being worn.
Once that was done I added pinstripe tape to the helmet (I think this is how the movie stripes were added) which was an absolute pain to try and keep in a straight line. 

All finished !


Saturday, 11 August 2012

Prop Blog Logo

Decided I'd make a logo to represent my user name that I can use to watermark photos and make things a little more professional looking I guess :D I use the name Vector Prime in other places such as Deviantart so I used vector shapes in Illustrator to design this with some tweaks in Photoshop to get a nice 80's G1 look:


Comicon

This is an extremely late post but Comicon went down well, got a good reception on the costume and got to take a few pictures as well as pose for quite a few too, this year was bigger and better than last years Comicon so here's hoping next year will be even bigger and better. Shamefully I had problems with the Visor for the Guy Manuel helmet and couldn't get a usable pull from my buck due to how large shape it is. Meaning I ended up as one of a two man ensemble, but it still went well and actually found another guy cosplaying Thomas who was great. I'll be reworking the helmet buck and will hopefully get it sorted, but this has now taken a back seat whilst I work on a Jango Helmet; anyway here's a few pics: